Butterfly valves are employed in a variety of sectors, from nuclear power plants to water treatment facilities. They are a crucial component of daily life for many people, who depend on them to switch off their sinks or showers in order to save water during a drought. However, these straightforward technologies ultimately wear down and require maintenance and repairs.
If a valve breaks down, it might seriously harm subsequent machinery or, worse still, trigger an explosion that could completely destroy your facility. Make sure you choose one from a reputable manufacturer of industrial valves. You will learn all there is to know about butterfly valves from this thorough manual, enabling you to rapidly diagnose and resolve issues.
How To Test Your Butterfly Valve?
Butterfly valves may be thought of as pressure vessels that must maintain tight seals while withstanding modest pressures. Fractures, missing Slag pores, and other flaws that might reduce durability shouldn’t exist in the valve body, valve cover, or other important parts.
- Valve Shell Examination
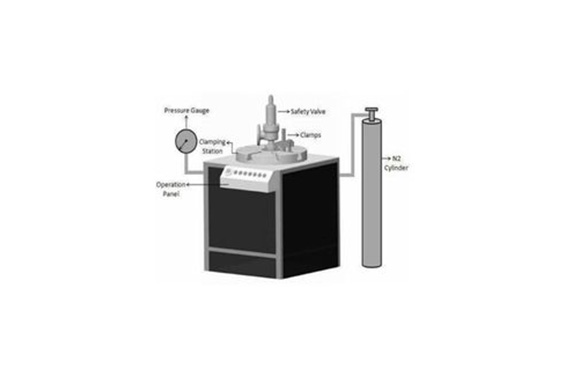
Leaks are detected by partially opening the valve and subjecting it to hydrostatic pressure 50 percent higher than the rated working pressure. During this test, a specific amount of pressure is delivered. There are also water temperature restrictions (41°F to 122°F).
To pass the test, there must be no leakage from the valve. When using stainless steel as a valve material, the chloride ion level must be less than 100 ppm.
- Valve Seat Leakage Examination
The valve is entirely closed in this test, with the intake submitted to hydrostatic pressure and the valve body filled with the testing fluid at a specific temperature.
Leaks are detected on the valve’s outlet side. Pressure must be lower than the maximum permissible pressure of 110 percent at 100 °F. Pressure is typically given for one minute. The valve must not leak from the stem or packing in order to pass the test. A small amount of leakage from the disc and seat sealing surfaces is acceptable.
- Inspection Of The Pressure Safety Valve
With the pressure safety valve removed, the inlet and exit pipework are observed during this valve check.
The following components are examined for signs of corrosion, deposit buildup, cracking, pitting, roughness, or other damage:
- External aspect
- Release nozzle
- Flanges
- Bellows and spring
- Seat Valve Test
The valve is fully opened while the ends are closed for this test. Lower than the maximum permissible pressure at 100 °F is not permitted.
For valves smaller than 2 inches and larger than 2 inches, the testing time is 15 and 60 seconds, respectively. The packing gland is carefully examined while undergoing the backseat test pressure during this procedure. If there are no leaks from the packing gland or the valve, it passes.
Why Is Valve Testing Necessary?
Precision control valves are essential for the smooth and safe operation of industrial processes and equipment. When valves most efficiently regulate process factors such as temperature, pressure, and flow, the production quality is best.
Valve performance testing supports both product quality and (most importantly) safety. Several plants or refinery explosions have been blamed on valve failure. To ensure safety, we adhere to established norms and industry standards.
Common Butterfly Valve Failure And Ways To Fix Them
The rubber elastomer within high-performance butterfly valves is the component that fails the most frequently. After prolonged usage, it may rip, wear out, perforate, or even come off. Therefore it becomes important to have knowledge about the butterfly valve connection for efficient repairing.
The butterfly valve repair that is required on-site cannot be met by the traditional thermal vulcanization process. It takes time and effort to fix with specialized equipment since it uses a lot of heat and power. Today, we use an inventive way to progressively replace old processes with polymer composite materials.
Their products’ exceptional adhesion and high durability against wear and tear ensure that the repair cycle may match or even surpass the lifetime of the original parts and greatly cut down on the amount of time needed for repairs.
Place the valve in the cavity to clean it before installation, making sure that the performance of the goods produced in our plant and the medium’s flow direction meet the circumstances under which it functions. No external objects may be fastened to the butterfly plate or sealing ring.To prevent harm to the sealing ring, the butterfly plate may be closed.
It is advised to utilize the HGJ54-91 socket weld steel flange, which is designed specifically for disc valves. The location of the installation in the pipeline. Although vertical is the preferred posture, it cannot be turned around. The course of usage will need adjustments to this flow. The flow rate is controlled by a worm gearbox.
Remove the worm gearbox lid after about two months for the valve on the disc with longer closing and opening times. Make sure you have enough butter by checking to see if the quantity is still in excellent shape. Check that the connecting parts are solid to ensure the filler’s bee and that the filler can freely move the valve stem.
How Can Difficulties With Butterfly Valves Be Avoided?
The bulk of problems with swing check valves or butterfly valves is due to improper installation, not the valve itself. In order to reduce butterfly valve maintenance concerns, it must be emphasized that butterfly valves must be placed properly during the commissioning procedure. The seal’s elastomer composition is one need that must be looked at during installation.
When you install it, it tends to travel toward the surface of the valve and then becomes crushed. As a result, its effects won’t last long and the valve won’t perform as intended by sealing valve when it’s open. In order to avoid hiding the sealing material, attention should be given when fitting the valve.
Another circumstance is when discs are near to the valve and stick out from the body. It is crucial to verify that the disc may freely rotate as it enters the valves.
Butterfly valves are often fitted with the stem vertical and the actuator situated vertically directly above it. Butterfly valves should be installed at least six pipe diameters apart from other line elements like elbows, pumps, and other valves. If this cannot be accomplished, valves should be placed as far away from these elements as practicable.
Finally, if a butterfly valve is linked to a check valve, leave enough space between the two to ensure that the movement of the butterfly valve disc does not interfere with the operation of the neighboring equipment.
Butterfly Valve Assembly And Installation Guide
Construction Of A Butterfly Valve

- Clean the lug-type butterfly valve from top to bottom. To aid in installation, apply the silicone-based base oil or any other lubricant.
- Put the bearing bush within the valve’s body.
- Your seat should now be in the valve body. For simple pipe movement, make sure the openings in the body and seat are lined up.
- Place a disc within the valve seat with the stem holes facing in the proper direction and the taper pin holes pointing up towards the top of the valve plate.
- O-ring for packaging installation.
- Install and screw the packing gland into place.
- Put the bottom cover in place.
- Taper pins should be inserted into the holes on the disc that match the holes on the stem. Firmly tighten them.
How To Open A Butterfly Valve In Steps?
Before a wafer butterfly valve is installed:
- Clean the pipe with air before installation and use, and then wash the inside surface with water.
- Verify if the valve’s performance criteria are compliant with its current state of service; (Position and temperature)
- Identify any contaminants in the valve channel or the sealing surfaces, and if there are any, get rid of them as quickly as you can;
- The valve needs to be placed at the proper time after packaging. Avoid removing the valve’s nuts or screws;
- The wafer butterfly valve needs fitting in a butterfly valve.
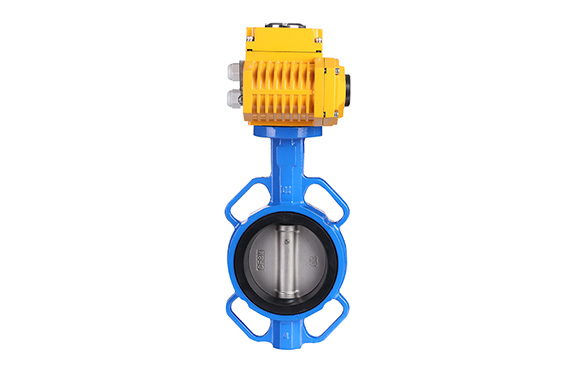
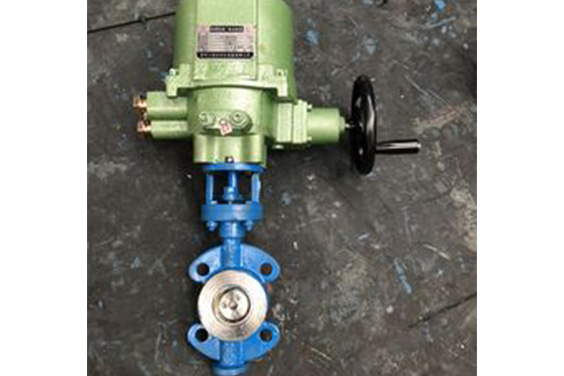
Electric-powered butterfly valves can be mounted at any angle to the pipeline. It is not advised to place them upside-down to make maintenance easier. Flanges are required while installing the butterfly valve in order to make sure that the rubber seal and flange surface are lined up and that the screws are tightened properly.
Furthermore, there are certain precautions that need to be taken while opening a butterfly valve. They are:
- The sealing surface must be completely seated. The rubber will expand and block the butterfly plate if uneven force is used to tighten the screws, and the valve rod may leak as a result of the plate adhering to it.
- Check that the operating conditions (temperature and pressure) are within the range allowed by the product being installed by using the pre-installation information/checklist.
- Make that the butterfly valve’s construction materials are chemically compatible with the media running through the pipeline.
- Verify that the pipeline’s mating flanges and the valve’s flange ends are clean and defect-free. The pipeline’s alignment has to be examined as well. It is never recommended to realign an existing pipe system using API butterfly valves.
- To guarantee there is enough space for the installation of the valve, the distance between the pipe flanges should be measured.
- Larger valves should be able to be lifted into place using the proper material handling equipment.
Butterfly valves may be fitted with flow going in either direction, either vertically or horizontally, and they are bi-directional. If there is a choice in stem position, the valve should be fitted with the stem in the horizontal position. Uniformly dispersing the weight of the stem and disc, will reduce seat wear. Additionally, the horizontal stem position produces a self-flushing action if the medium is abrasive, which will increase the service life expectancy of the valve.
Verify that there are no interferences and that the current pipe diameters correspond to the inlet and output sizes of the installation unit. Additional support can be required if pipeline strain is an issue with bigger valves (due to weight).
There is no need for extra gaskets because the rubber seat serves as the seal between the flanges as well. Butterfly valves should, if at all feasible, be positioned at least six pipe diameters from upstream components and four pipe diameters from downstream components.
Butterfly Valve Installation Procedures
The seal quality, whether or not the butterfly valve is leak-proof, and the safety of operation under working conditions will all depend on how the butterfly valve is installed. The installation method must be understood by the user.
Install a lever (for a manually controlled valve) or a hand-wheel (for gear operated valve). Make sure the valve is fully closed by turning the lever or handwheel in a clockwise direction. The disc needs to be parallel to the ends.
For lever style, if the disc is not parallel to the ends, gently loosen the top plate (by removing two bolts), move the lever counterclockwise until the disc is centered and parallel to the ends, and then retighten the top plate. On the gearbox side, adjust the hex nuts for the gear-operated valve. For effective operation, the disc must be fully opened and closed multiple times. Repeat if re-alignment is required.
Install the valve into the piping system now. It should be noted that whereas tapped “lug” type valves are put between flanges with tiny cap screws on the valve’s inlet and outlet, “wafer” style valves are positioned between flanges and fastened with fully threaded studs.
To avoid deformation and/or damage to the sealing face of the seat, spread the mating flanges such that they are 3/16″ larger than the valve’s face-to-face size. Make sure that any foreign material, such as scale, metal shavings, or welding slag, is completely removed from the pipe flange faces. Make sure that any foreign material, such as scale, metal shavings, or welding slag, is completely removed from the pipe flange faces.
Close the disc, gently place it between the flanges, align it, and center it. Keep in mind that precise centering between the upstream and downstream pipe ends is necessary for the valves to operate without issue. Secure by hand-tightening flange bolts as you progressively remove the flange spreader and make sure the valve is centered on the flanges.
To ensure that the disc can travel freely and without obstruction and that there is no contact with the pipe or mating flanges, progressively open the valve to the fully open position. The installation of valves in pipelines with smaller-than-normal interior diameters, such as heavy wall pipe, plastic-lined pipe, as-cast flanges, or decreasing flanges, may cause disc interference. Connecting directly to a swing check or quiet check might also cause interference. To eliminate these blockages, appropriate remedial actions must be done, such as taper drilling the pipe or adding a spacer or spool piece.
Flange bolts should then be tightened to the specified torque values once appropriate functioning has been confirmed. To load the bolts uniformly, use a star or crisscross pattern.
Pump up the pipe to the valve and check for leaks. If leakage is seen, twist the bolts using a cross-over pattern until the leak is stopped. Please take note that suggested torques are provided “as it is.” The installer must confirm the appropriate bolts’ strength for the application. Bolts should be free of lubricant and clean.
Butterfly Valve Seat Replacement Guide

Seats are typically formed of polymers and are pressed, fastened down, or attached to the body. Polymer is used to improve the leak-proof ability of the seal between the seat and the disc. These two will seal together if you press the disc against the seat. This will bring the flow to a halt. It’s worth noting that the seat runs the length of the butterfly valve’s inner diameter.
Here’s when the actuation method comes into play. Depending on the design, butterfly valves can be regulated manually or automatically. They have handles and gears if they are manual. They have pneumatic, electric, or hydraulic actuators if they are automatic.
When a valve is closed, the seat creates the space where floating ball valves for the intake and exhaust rest. As a crucial component of combustion, this seat can cause the valve to not sit properly, allowing combustion gases to escape and lowering compression. In addition to this important procedure, heat is transferred from the valves to the cylinder head through the valve seat.
The valve seat may eventually become worn out, decreasing its effectiveness and increasing compression. If the severity of the wear prevents us from cutting the seat, we can remove it from the seat and replace a brand-new valve seat.
Blanks are used to create these valve seats in accordance with. If the valve’s seat has been put into the head of the cylinder, we can make it into IDL. IDL and then construct seats that fit. For engines to be converted to run on non-leaded gasoline, valve seats must be replaced. Let’s say you convert when you perform a conversion.
In that scenario, you must change the exhaust seats to an extremely robust material because of the higher temperature that happens in combustion. One can buy valve seats in a variety of sizes and modify them to fit almost any bike. We cut valve seats and machine out old seats using the most advanced technology, SERDI. To fit premium cylinder head applications, we provide Beryllium Copper seat valves and regular steel OEM seats.
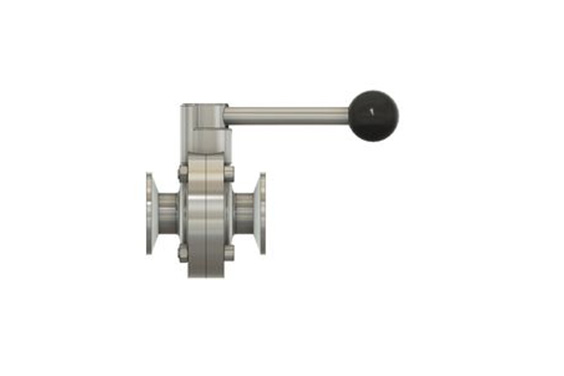
Butterfly Valve Handle Replacement Guide
These parts are typically composed of steel and are chemically treated and powder coated in order to withstand rigorous inspection/salt spray testing for dimensional accuracy. Hand levers typically have a handle and a locking lever.
Furthermore, they are typically utilized for small butterfly valves. These hand levers can be locked in three positions: closed, open, and partially open. These parts are typically composed of steel and are chemically treated and powder coated in order to withstand rigorous inspection/salt spray testing for dimensional accuracy. Hand levers typically have a handle and a locking lever. Furthermore, they are typically utilized for small butterfly valves. These hand levers can be locked in three positions: closed, open, and partially open.
There are a few different types of butterfly valves, and each one has its own unique set of problems and troubleshooting procedures. If you’re having trouble with your butterfly valve, it’s important to first figure out which type it is, so that you can start solving the problems specific to that type.
If you’re experiencing problems with your butterfly valve, it’s also important to know the basics about how it works and what to do if it starts to malfunction.
Butterfly valves are a type of water valve that uses simple physics to open and close small streams of water. When they’re working properly, butterflies move up and down in a circular motion, opening and closing the valve as needed.
There are several things that can go wrong with butterfly valves, including:
- The handle may become loose or lose its tension
- The bearings may become worn or corroded
- The cable may corrode or break
- The seal between the housing and butterfly actuator may fail
Then, you’ll need to identify the specific problem and work through a step-by-step troubleshooting procedure to fix it. Keep in mind that sometimes things will be easier if you can see the valve in action. This is why it’s often helpful to take pictures or videos of the problem while it’s happening so that you have a clear record of what occurred.
Conclusion

Have you ever had a problem with your butterfly valve? Don’t worry, this article has solved common butterfly valve problems. Just make sure to follow the butterfly valve troubleshooting guide and take care of your valve in a professional manner before it gives up on you! In case everything goes wrong, don’t hesitate to contact an expert from industrial valve company for help as they have years of experience and expertise in testing and repairing butterfly valves from different brands.